Yeast Starters for Home Beer Making
Making a Starter
for Wyeast Liquid Beer Yeast
Making a starter is particularly important if you want to insure that your efforts have the best opportunity to make a good batch of beer - EVERY TIME. By making a starter, you will expand your yeast cell count from 10-60 billion cells to a count in excess of 100 billion cells which allows a quicker on set of active fermentation.
The Yeast pack should be refrigerated upon arrival, after noting the packaging date. This date allows for an estimation of the anticipated incubation period before the yeast will be active. A date two months old will indicate a two day incubation period. It is always better to use the yeast before it is more than three (3) months old. We highly recommend maintaining on hand an appropriate dry yeast as a back-up in case problems with activation occur.
Activation Process - Activate as indicated on the packet. At the same approximate time, refrigerate one (1) pint of water (@40º) in a sanitized beer bottle.
Making a Yeast Starter
Once the yeast packet is fully activated (expanded like a little stuffed pillow) it is most ideal to make a yeast starter. This is particularly true about lager yeast.
NOTE: You have a 24+ hour window of opportunity to make the starter. The older the yeast packet, the more important it is to make a starter. Without making a starter, activity could be slow getting started, allowing wild yeast and bacteria to have an impact on the quality of your batch. The resulting lag time could advance into the 24 to 72 hour range before activate is achieved.
Starter Bottle - An erlenmeyer flask is the best starter bottle. The amount of surface area will have a direct impact on how much foam will be evident in the starter bottle - the more surface area, the less foam. The foam will be 1-2 inches thick in a flask but only be 1/8th to 1/2 inch thick in a 2-liter “Coke” bottle or a gallon jug, not nearly as much as you have experienced in your 5-gallon batch of beer. Sanitize the starter bottle, the stopper and the airlock before use.
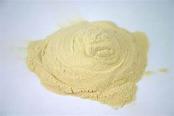
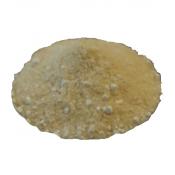
The pint of water that we put in the refrigerator when we activated the smack pack should be about 40º by this time. Dissolve the package of DME STARTER in an additional (1) pint of water. Bring up to 175º and hold that temp for 5-10 minutes. Allow to cool, in an ice bath, to 110°. When you add the pint of refrigerated water (40º) and the cooled starter solution (110º) to your sanitized starter bottle you should achieve a temperature of 75°. Aerate well by means of an “Oxygenator” or by shaking. The starting gravity of the starter will be about 35-40 (i.e. 1.035 to 1.040).
Sanitize the activated yeast pouch and the scissors, open and pour into the starter bottle. Affix a sanitized stopper and airlock to the bottle. While it is possible to cover the opening of the bottle with a piece of sanitized tin foil or a loose fitting cap, it is not recommended. Fermentation should be active in about half the time it took for the pouch to expand. Visual signs of activity will be the surface foam, airlock activity and an increase in yeast sediment on the bottom.
NOTE: When the foam is evident, you have a 12 - 24 hour window of opportunity to make the batch of beer, achieving the best results. The fresher the yeast the shorter the time frame in which the foam will be present.
DO NOT PROCEED WITH MAKING THE BATCH, without confirmation of fermentation in the starter bottle. If you didn’t see the foam but the starter has advanced into the time frame that such evidence should have been detected, you can take a hydrometer reading. The starter would have had an initial gravity of 35-40 prior to fermentation, after fermentation the gravity will finish around 10-15. Making a starter of the size that we suggest, you’ll be able to take 2 or 3 hydrometer reading if needed.
Ideal pitching (the brewing term for adding the yeast to the wort of your main batch) temperatures will always be in the 70°-75° range, whether ale or lager. Pitching temperatures above 90° could damage the yeast. Pitched at temperatures below 70°, the yeast activity will be slow and the resulting lag time could allow for problems to develop.
Pitching the Starter to Your Main Batch - When you pitch the starter, you want to transfer as much of the yeast sediment on the bottom of the starter bottle as possible. This is were the vast majority of the yeast resides that will be responsible for getting the batch off to a good start.
Pitching and Fermentation Temperatures
Ales yeast should be pitched into wort cooled to 75°.
Fermentation in 65°-75° temperature range should last 1-3 days.
Pilsners and Lagers yeast should be pitched into wort cooled to 70°.
The primary should be stored in 65°-75° temperature range until active fermentation is detected.
At that time, the primary should be moved to a more ideal temperature for yeast, usually in 50°-55° range. The fermentation will last 7-14 days depending on the yeast and the temperature of fermentation.
After the primary fermentation is complete, the temperature of the batch should be stepped up into the 65°-70° range over a 2-3 period. Any yeast activity should be allowed to stop before racking into a clean and sanitary carboy. With the completion of the racking the temperature of the batch should be stepped down over a couple days time, into the 40°-45° range to take advantage of the "true" lagering phase of this style. This lagering phase could last a few days or up to 3 weeks, at your discretion.
|
| |||||||||
|
| |||||||||
|